In this blog post, we will cover how to use Auth0 Webtasks, a serverless platform to monitor the twitter feed of FreedomeVPN and send us an email using Sendgrid when we find a promotion on Freedome VPN
The idea
Ok, so the idea is to watch the tweets from @freedomeVPN (using the Twitter API) and when there’s a tweet that seems like it’s a promo on the freedome VPN service, be notified so that we can save some money. I’ve been using freedome on my Windows PC and Android phone for 1+ years now and it’s great. I started using it on Troy Hunt’s recommendation and I’m very satisfied with it.
Example of email received when the notification fires:
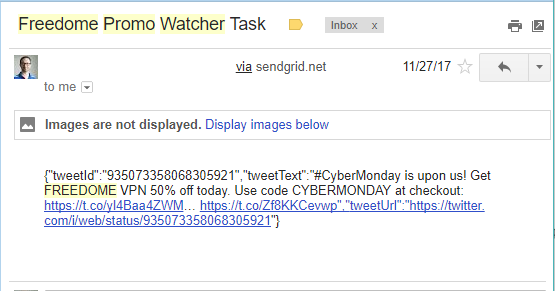
Ok, it’s a bit rough and could be improved but it does the job for now ;)
How are we going to do this?
Serverless is pretty hot these days. The idea being that you can just worry about code and NOT the infrastructure on which it runs is great. Also, serverless platform (Auth0 Webtasks, Azure Functions, AWS Lamba) are very cheap, even free when your usage is low.
So, we write a javascript function that will, on a schedule:
- fetch the latest tweets from
@freedomeVPN - Scan through each tweet’s text to figure out if there’s a promotion in there
- Use the Sendgrid Mail v3 API to send ourselves an email with that tweet information
Step 1: setup a twitter dev account and app
- If not already done, head over to https://developer.twitter.com and register as a twitter dev (think you need to click on ‘Apply’)
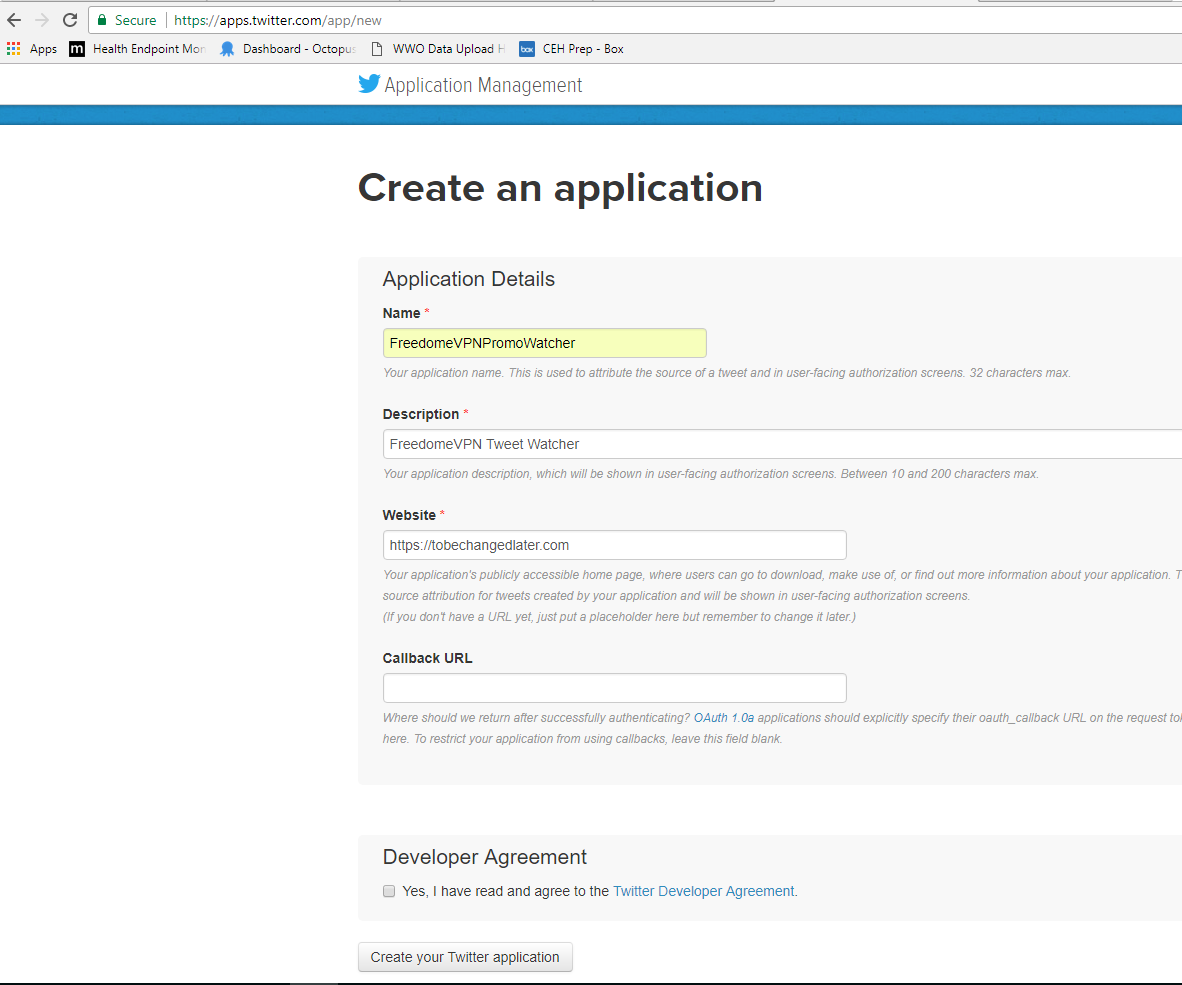
- Twitter API works off the concept of application. Basically any https calls made to the API must be made in the context of an application. There’s a lot more than we need here, but we still need an application. Navigate to https://apps.twitter.com and create a new application like so:
- Then take note of the
API KeyandAPI Secretfrom theKeys and Access Tokenstab. They will be used to authenticate against the twitter api later: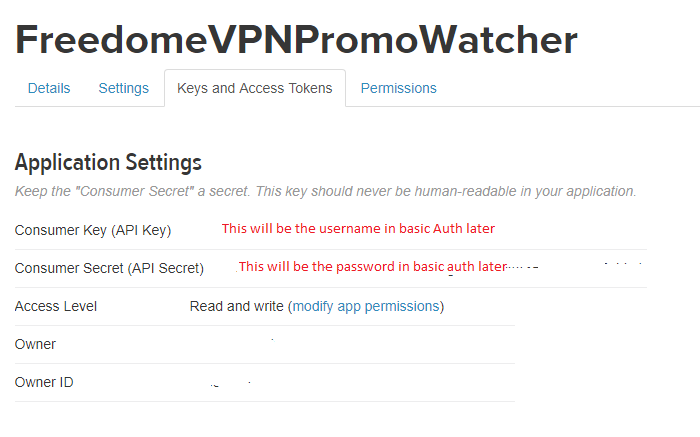
Step 2: setup a Sendgrid account
- Create yourself a free account at https://sendgrid.com.
- I think you have to complete their Integration flow for your account to be active, but I’m not sure. I had a little bit of difficulty here and had to chat with support which got the matter resolved.
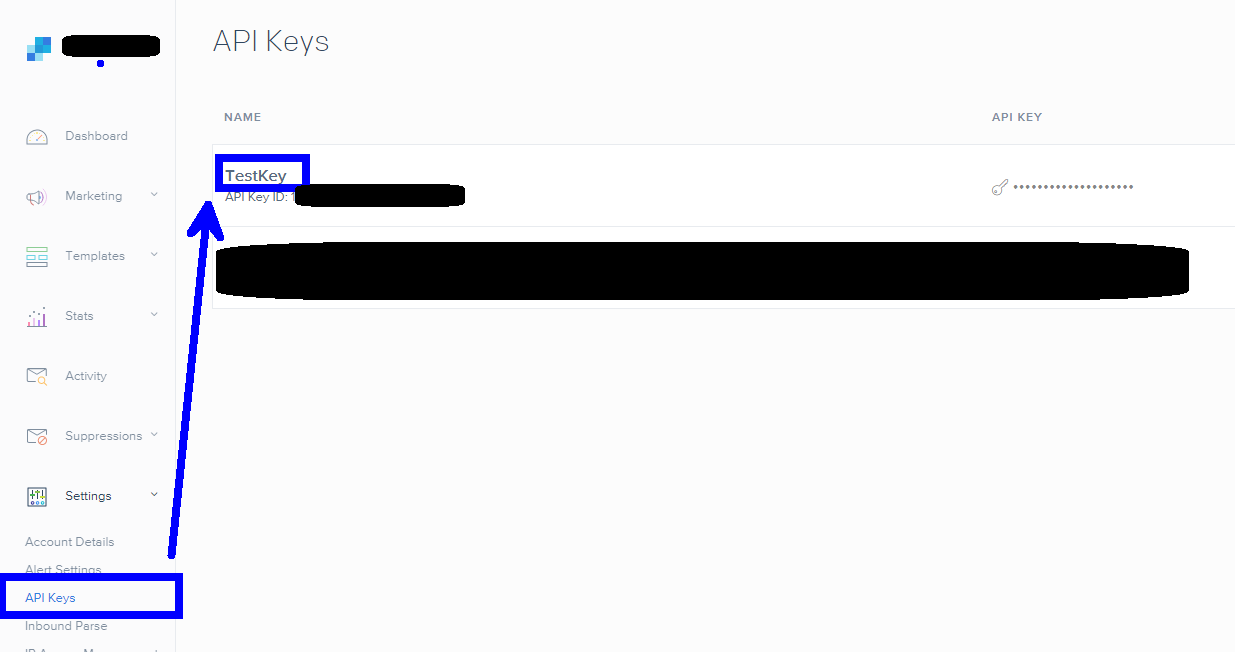
- Get an API key like so: Take a note of the API Key somewhere:
Step 3: setup an Auth0 Webtasks
- Go to https://webtask.io and setup your account
- You can use the CLI to create the webtask but I’ve used the HTML editor instead. So go to https://webtask.io/make to invoke the editor
- Create a new Webtask (select
Empty Functionfor the type) and give it a name
Step 4: Put some code in the function
You can start with this code:
'use latest';
import sendgrid from '[email protected]';
import rp from 'request-promise';

const helper = sendgrid.mail;
module.exports = (context, cb) => {


    context.storage.get(function (error, data) {
        var lastTweetId = data.lastTweetId;
        var fromEmail = context.secrets.FROM_EMAIL;
        var toEmail = context.secrets.TO_EMAIL;

        var twitterUrl = 'https://api.twitter.com/1.1/statuses/user_timeline.json?screen_name=freedomeVPN&count=100&exclude_replies=true&trim_user=true';
        if (lastTweetId) {
            twitterUrl += '&since_id=' + lastTweetId;
        }
        var options = {
            uri: twitterUrl,
            headers: {
                'Authorization': 'Bearer ' + context.secrets.TWITTER_API_KEY
            },
            json: true // Automatically parses the JSON string in the response
        };

        return rp(options)
            .then(function (respJson) {

                //console.log("resp: " + JSON.stringify(respJson));


                if (respJson.length > 0) {
                    var promoTweets = [];
                    for (var i = 0; i < respJson.length; ++i) {
                        if (respJson[i].text.includes('%')) {
                            promoTweets.push({ tweetId: respJson[i].id_str, tweetText: respJson[i].text, tweetUrl: `https://twitter.com/i/web/status/${respJson[i].id_str}` });
                        }
                    }

                    if (promoTweets.length > 0) {
                        const mail = new helper.Mail(
                            new helper.Email(fromEmail),
                            'Freedome Promo Watcher Task',
                            new helper.Email(toEmail),
                            new helper.Content('text/plain', JSON.stringify(promoTweets[0])));
                        const sg = sendgrid(context.secrets.SENDGRID_API_KEY);
                        const request = sg.emptyRequest({
                            method: 'POST',
                            path: '/v3/mail/send',
                            body: mail.toJSON()
                        });
                        return sg.API(request)
                            .then(response => {
                                context.storage.set({ 'lastTweetId': respJson[0].id_str }, { force: 1 }, function (error) {
                                    if (error) return cb(error);
                                    cb(null, response)
                                });
                            })
                            .catch(cb);

                    } else {
                        cb(null, `Found ${promoTweets.length} new tweet but no promo`);
                    }

                } else {
                    cb(null, "no new tweet since: " + lastTweetId);
                }
            })
            .catch(cb);
    });
};
Let’s break it down a bit…
First the programming model that webtask uses is described in details here but the general idea of it is that we need to export a function that will call the node.js callback function (cb in this case) when your job is done. Auth0 Webtasks will invoke our function either on 1) a http request on the webtask URL or 2) on a CRON schedule.
module.exports = (context, cb) => {cb(null, "Job done")}
Second we will need to invoke the twitter API to get tweets.
We do this by invoking the twitter API at https://api.twitter.com/1.1/statuses/user_timeline.json?screen_name=freedomeVPN&count=100&exclude_replies=true&trim_user=true&since_id=XXXXXX. This basically gets us a JSON response with all tweets from @freedomeVPN since the tweetId specified on the since_id parameter
We must include our authentication header to those calls. This is a 2 step process.
We will be using the the concept of application only authentication for the twitter api. This means that we have to exchange our username/password for a bearer token and then use that bearer token against the twitter API.
Since the bearer don’t seem to expire, we just use Postman to POST to https://api.twitter.com/oauth2/token using basic auth where the username is the API key and the password is the API Secret. That gives us back an access token in the form of Bearer XXXXXX
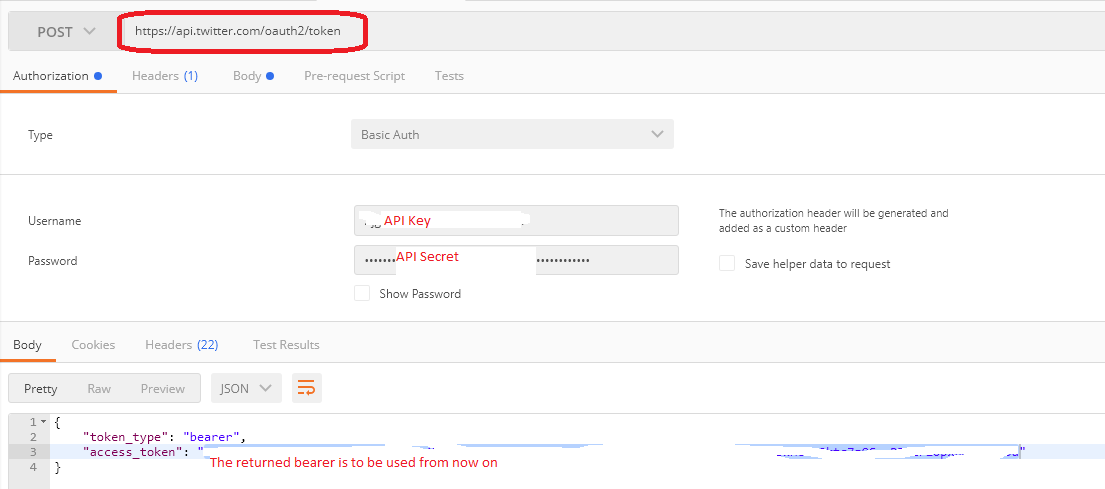 We set that bearer on the authorization header of every twitter API calls like so:
    headers: {
    'Authorization': 'Bearer ' + context.secrets.TWITTER_API_KEY
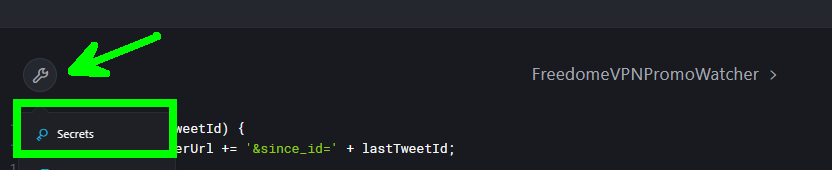
Notice that we are pulling the twitter api key from a Webtask feature called secrets. This is basically a set of encrypted values that your webtask has access to. Great place to put API keys. In order to set the secret, you can use the editor
Third we will check if any tweet returned by the API seem to have a promotion in it. So far, this check is very very very simplistic (we just check that the string of the tweet contains ‘%’)
if (respJson[i].text.includes('%')) {
Fourth We invoke Sendgrid HTTPS API to send ourselves an email
Fifth
We have to save the last tweet ID returned in this request to not request it again later. This is used by leveraging another of Auth0 Webtasks feature called storage. Storage a 500 kb JSON object that you can read and write to. So we save our lastTweetId this way:
context.storage.set({ 'lastTweetId': respJson[0].id_str }, { force: 1 }, ...
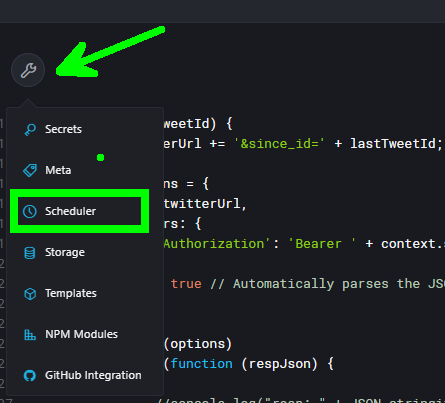
Step 5: Set the task to run on Schedule
You can now set the task to run periodically through a CRON schedule. We have ours set to run every 6 hours. This can be accomplished from here:
It’s a bit rough –> things that could be improved
As you can see, this is still a bit rough around the edges and a lot of things can be improved. For example:
- Simplify the nested callback structure
- Maybe using things like
Asyncnpm module to make code more readable.
(EDIT Jan 4th 2018: Auth0 Webtasks support Node8 so I could use
Async/Await) - Maybe using things like
- Handle the case where multiple tweets have the ‘%’ char in it
- …
Conclusion
I know there are other options out there to do similar things.
- I’ve tried https://ifttt.com and it seems like it was lacking a way to apply filtering on the incoming tweets
- I know https://zapier.com can be used here but not sure about the pricing
But i’ve worked on this Webtask because I wanted to experiment with threading together different services in a serverless environment.
Overall, I must say that working with Webtask was pretty easy even though most of experience is on the c#/.net stack. In this particular case I really enjoyed:
- the programming/debugging experience in the browser for really fast iteration on the code
- the
secretsfeature of webtask to hide away api keys and avoiding checking them in in Github
Hope it helps
Subscribe via RSS